-
Shop
- Advanced Technologies
- Beauty
- Best-Sellers
- Car Accessories
- Dating & Social Skills
- Digital Resources
- AI & Technology
- AI Skills
- Car Buying & Ownership
- Cozy Feast Collection
- Electronics & Technology
- Emotional Intelligence
- Financial Education
- Hobbies
- Home Styling & Organization
- Kitchen & Recipes
- Mindfulness
- Mindset
- Online Business
- Parenting & Child Development
- Pet Lifestyle & Wellness
- Positive Thinking
- Productivity
- Self Confidence
- Sleep Improvement
- Smart Life with AI
- Stress Management & Relaxation
- Travel Planning
- Yoga & Fitness
- Yoga & Mind-Body Practices
- Education & Learning
- Family & Parenting
- Fashion
- Fashion Accessories
- Furniture
- Gadgets
- Health & Beauty
- Health & Wellness
- Home & Garden
- Home Supplies
- Kids & Babies
- Kitchen
- Kitchen Best-Sellers
- Lighting
- Patio, Lawn & Garden
- Personal Growth
- Personal Style & Fashion
- Pet Care
- Pet Supplies
- Pets
- Sport & Outdoors
- Super Deals
- TikTok Growth & Monetization Mastery
- Travel
- Wealth
- Wealth Building
- Budgeting & Saving
- Cryptocurrency Investing
- Debt Management
- Entrepreneurship & Business Growth
- Family Finance & Budgeting
- Financial Independence
- Financial Mindset & Psychology
- Financial Planning
- Frugal Living & Expense Hacks
- Goal Setting
- High-Income Skills
- Investing Basics
- Leadership
- Motivation
- Networking & Mentorship
- Passive Income Strategies
- Real Estate Investing
- Side Hustles
- Stock Market Investing
- Wellness
- Popular
- Best deals
Precision Eyeshadow & Highlight Brush: Clean Detail Guide
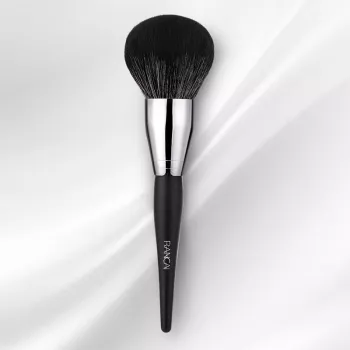
Precision Eyeshadow and Highlight Brush: Detailed Placement, Smooth Blending, and Clean Edges
A small, tapered brush can change the way eye looks and highlight placement come together—tight control where it’s needed, softer diffusion where it flatters most. A precision eyeshadow and highlight brush is designed to place pigment in compact areas without flooding the lid or cheeks with product, making it easier to build dimension, keep edges clean, and avoid “over-blending” the shape away. Below, you’ll find the techniques this brush excels at, quick placement ideas, finish-specific tips, and simple care steps that keep bristles performing like new. For more guidance, see Assessing the Levels and Types of Bacterial Contamination in ….
What This Brush Does Best
- Targets small areas: inner corner, brow bone, outer V, lower lash line, cupid’s bow, and the bridge/tip of the nose.
- Builds pigment gradually for fewer harsh lines and less fallout.
- Creates crisp placement first, then softens edges without shifting base makeup underneath.
- Works across formulas, including powder shadow, shimmer toppers, and subtle powder highlights.
Eyeshadow Placement Ideas That Benefit From a Precision Shape
- Inner-corner brightening: Place shimmer exactly where the tear duct catches light, then lightly feather outward so the glow looks intentional—not spread across the whole lid.
- Outer V definition: Stamp a deeper shade into the outer corner, then blend in tiny circles to keep lift and structure (especially helpful for hooded or downturned eyes).
- Lower lash line smoke: Use a light hand and short strokes; connect to the outer corner to create a clean, winged effect without needing tape.
- Cut-crease detailing: Sketch the crease line with a mid-tone, then soften only the upper edge so the shape stays sharp while the blend looks seamless.
- Spot-correcting: Tap over small patches where shadow looks uneven rather than redoing the entire lid and risking muddiness.
Highlight Techniques for a Natural, Controlled Glow
- Brow bone: Choose a satin (not glitter-heavy) highlight and apply right under the arch; blend only upward to keep the brow line crisp.
- Inner corner + upper cheekbone connection: A tiny touch can visually open the eye—keep it minimal so the face doesn’t look over-highlighted in daylight.
- Nose highlight: Use very little product; start at the center of the bridge and stop before the tip to avoid a noticeable “stripe.”
- Cupid’s bow: Tap once, then diffuse the edges so lip liner and lipstick shape remain defined.
- Texture-friendly application: Press and roll rather than sweeping to reduce emphasis on pores and fine texture.
For the smoothest glow, start with clean, well-prepped skin and avoid heavy rubbing over freshly applied base products. The American Academy of Dermatology Association shares practical, gentle cleansing guidance here: https://www.aad.org/public/everyday-care/skin-care-basics/care/face-washing. For further reading, see Precision Eye Makeup Brush Pack with Tapered Handles for ….
Best Product Pairings (Powders, Creams, and Shimmers)
- Powder mattes: Ideal for controlled depth and crease definition; tap off excess before touching the lid.
- Shimmers and metallics: Pack onto the lid with gentle pressing motions; lightly mist the brush for more intensity when needed.
- Cream products: Use sparingly; pick up a tiny amount and blend quickly to avoid patchiness and accidental lifting.
- Loose pigments: Pair with a tacky base (primer or glitter glue) to minimize fallout and keep sparkle where you place it.
Quick Guide: Technique by Finish
| Finish | Pick-Up Method | Application Motion | Best Areas |
|---|---|---|---|
| Matte powder | Light tap into pan, tap off | Short strokes + tiny circles | Outer V, crease detail, lower lash line |
| Shimmer/metallic | Press into pan (minimal tapping) | Press then micro-blend edges | Inner corner, center lid, brow bone |
| Soft highlight powder | Barely graze surface | Press/roll, then feather | Brow bone, cupid’s bow, nose |
| Cream shimmer | Touch tip to product | Tap to place, quick blend | Inner corner, small lid sections |
When trying new eye or face products, it also helps to stick with reputable labeling and safety guidance. The FDA’s cosmetics overview is a useful reference for general product information: https://www.fda.gov/cosmetics.
Step-by-Step: A Polished Everyday Eye in 5 Minutes
- Prime the lid and set lightly with a skin-tone shade to prevent skipping and patchiness.
- Add a mid-tone matte to the outer third and crease, keeping the shape lifted toward the brow tail.
- Deepen the outer corner with a darker shade using stamping motions, then soften only the edge (avoid blending too far inward).
- Press shimmer on the inner third or center lid for dimension; avoid sweeping across the whole lid so the look stays clean.
- Finish with pinpoint highlight at the inner corner and a soft pass under the brow arch for a bright, polished effect.
Care and Cleaning for Consistent Results
Common Mistakes That Make Detail Brushes Look Patchy
Product Options
- Precision Eyeshadow and Highlight Brush: a compact tool for targeted placement and controlled blending for eye looks and subtle highlight work. Handy for inner-corner shimmer, brow-bone highlight, outer-corner depth, and lower lash line definition.
- Versace Reversible Jacket with Iconic Barocco Pattern: a statement outer layer that pairs well with polished makeup looks—useful when you want your eyes and highlight to read refined in evening lighting.
FAQ
Can a precision eyeshadow and highlight brush be used for both shimmer and matte shadows?
Yes. Use pressing motions to pack on shimmer/metallic shades, and use short strokes or tiny circles for matte shades; tap off excess to reduce fallout and harsh lines.
How often should this type of brush be cleaned?
Wipe off pigment after each use and wash weekly. Clean more frequently if you use creams or if the brush starts applying unevenly.
Why does highlight sometimes look too intense with a small brush?
A smaller brush can concentrate product in one spot. Pick up less powder, press/roll instead of sweeping, and diffuse the edges so the glow stays soft and controlled.













Leave a comment