-
Shop
- Advanced Technologies
- Beauty
- Best-Sellers
- Car Accessories
- Dating & Social Skills
- Digital Resources
- AI & Technology
- AI Skills
- Car Buying & Ownership
- Cozy Feast Collection
- Electronics & Technology
- Emotional Intelligence
- Financial Education
- Hobbies
- Home Styling & Organization
- Kitchen & Recipes
- Mindfulness
- Mindset
- Online Business
- Parenting & Child Development
- Pet Lifestyle & Wellness
- Positive Thinking
- Productivity
- Self Confidence
- Sleep Improvement
- Smart Life with AI
- Stress Management & Relaxation
- Travel Planning
- Yoga & Fitness
- Yoga & Mind-Body Practices
- Education & Learning
- Family & Parenting
- Fashion
- Fashion Accessories
- Furniture
- Gadgets
- Health & Beauty
- Health & Wellness
- Home & Garden
- Home Supplies
- Kids & Babies
- Kitchen
- Kitchen Best-Sellers
- Lighting
- Patio, Lawn & Garden
- Personal Growth
- Personal Style & Fashion
- Pet Care
- Pet Supplies
- Pets
- Sport & Outdoors
- Super Deals
- TikTok Growth & Monetization Mastery
- Travel
- Wealth
- Wealth Building
- Budgeting & Saving
- Cryptocurrency Investing
- Debt Management
- Entrepreneurship & Business Growth
- Family Finance & Budgeting
- Financial Independence
- Financial Mindset & Psychology
- Financial Planning
- Frugal Living & Expense Hacks
- Goal Setting
- High-Income Skills
- Investing Basics
- Leadership
- Motivation
- Networking & Mentorship
- Passive Income Strategies
- Real Estate Investing
- Side Hustles
- Stock Market Investing
- Wellness
- Popular
- Best deals
Modern Kitchen Slogan Wall Sticker: Placement & Prep Guide
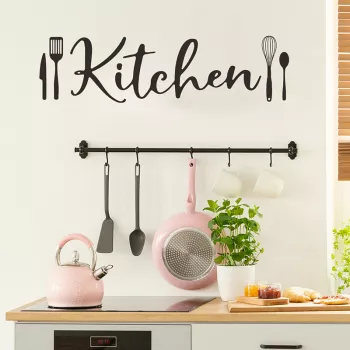
Creative English Slogan Kitchen Wall Sticker – A Small Detail That Finishes the Room
A kitchen feels more “done” when there’s one intentional detail that ties the space together. Our Creative English Slogan Kitchen Wall Sticker adds that finishing touch with clean, modern lettering—perfect for brightening a breakfast nook, framing a coffee corner, or giving a rental-friendly refresh without a remodel. If you’ve got a wall that looks a little too empty (but you don’t want to commit to frames, nails, or a full gallery), a simple slogan decal can create a designed, finished look in minutes.
Where this sticker fits best in a modern kitchen
Our team sees this style work best when it acts like a “label” for a small zone—giving your space a purpose and a focal point without adding clutter.
- Coffee station: Place it above your mug rack or next to the espresso machine to create a designated moment.
- Dining wall: Use it as a simple focal point behind a small table or bench seating.
- Backsplash-free zones: Add personality to blank wall space that feels unfinished.
- Pantry or nook: Style it with a small shelf, framed print, or plant for a curated look.
- Open-plan kitchens: Helps visually separate the kitchen area from living space without adding furniture.
How to choose the right placement (so it looks intentional)
Placement is what makes a wall decal read like décor instead of an afterthought. A few small choices—height, alignment, and spacing—do most of the work.
- Start with eye level: On most walls, the center of the design looks best around 57–60 inches from the floor (adjust if it’s above a table, shelf, or sideboard).
- Work with what’s already there: Align with cabinet edges, shelf lines, or the center of a table to avoid a “floating” look.
- Leave breathing room: Keep a clear margin around the sticker so the text reads cleanly—especially near switches, outlets, or frames.
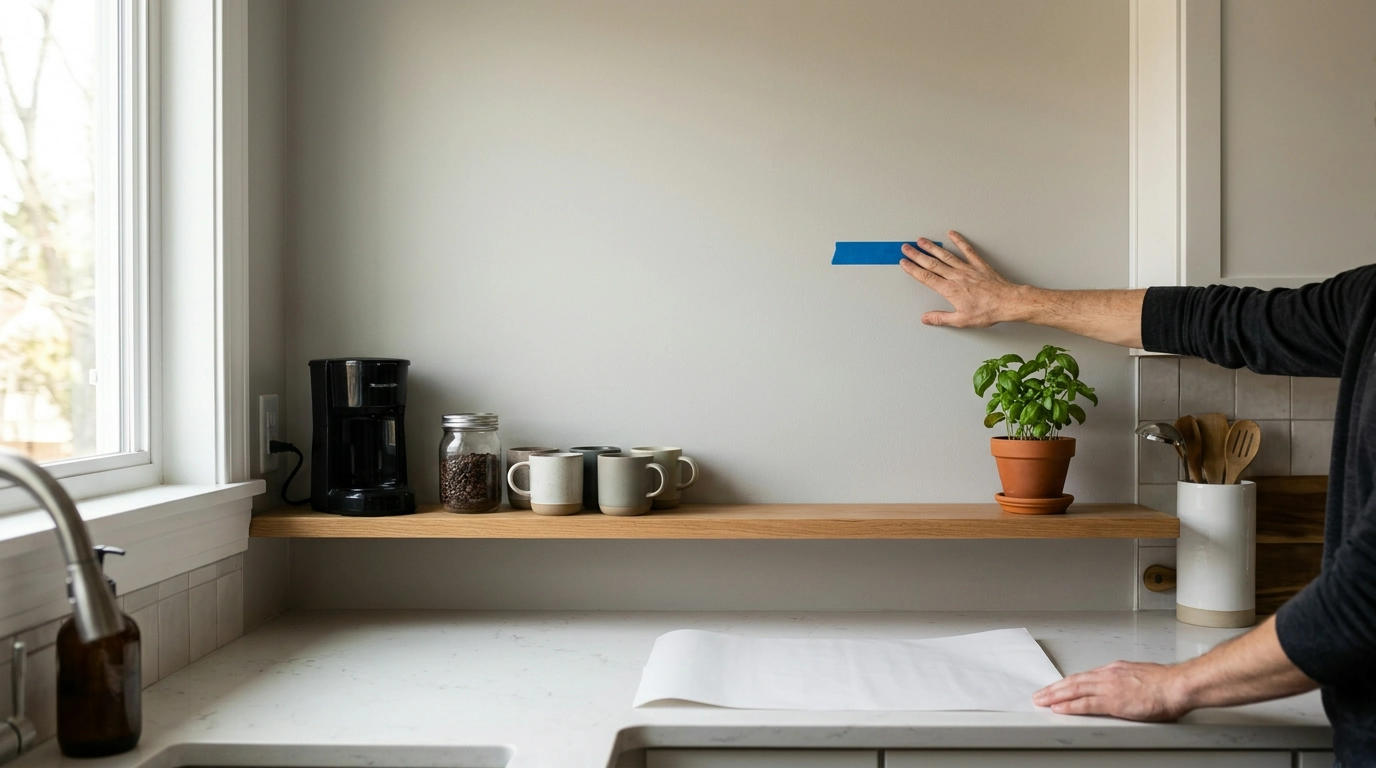
- Test before sticking: Use painter’s tape to outline the approximate size and step back to check balance from multiple angles.
- Avoid heat and splash zones: Keep distance from stovetops, kettle steam, and areas that get frequent heavy cleaning.
Quick placement guide
| Spot | Best pairing | Tip for clean alignment |
|---|---|---|
| Coffee corner | Floating shelf + mugs | Align the sticker with the shelf length, not the counter edge |
| Dining wall | Small table + pendant light | Center it to the table width (or the light if centered) |
| Pantry entry | Basket hooks + labels | Place it above eye level if the doorway visually “cuts” the wall |
| Blank side wall | One framed print | Keep the sticker and frame edges parallel; match spacing |
Surface checklist: what makes application easy and long-lasting
Smooth, clean surfaces help the adhesive bond evenly and keep the lettering crisp. In real kitchens, dust and cooking residue are the usual culprits behind lifting corners—prep matters more than pressure.
- Clean and dry beats “press harder”: Grease film is often invisible, but it can break adhesion over time.
- Give fresh paint time: Recently painted walls should be fully cured before applying adhesive décor (dry to the touch isn’t always fully cured).
- Texture changes everything: Light texture can work, but heavy texture reduces contact area and can cause early lifting.
- Choose a calmer spot: Areas that get scrubbed often (or hit with harsh cleaner) are not ideal for long-term results.
Surface compatibility & prep steps
| Surface type | Recommended? | Prep in 2 steps |
|---|---|---|
| Painted drywall (smooth) | Yes | Wipe with a dry microfiber cloth; then wipe lightly with isopropyl alcohol and let dry |
| Gloss/semi-gloss paint | Yes | Degrease with mild soap and water; dry fully before application |
| Tile (smooth) | Usually | Clean grout haze/grease; dry and apply with firm, even pressure |
| Wood (sealed) | Usually | Dust thoroughly; ensure finish is fully cured and dry |
| Textured walls | Maybe | Test a corner first; use extra pressure and patience on raised areas |
| Brick/rough surfaces | No/Not ideal | Adhesion may fail due to low contact area |
A simple application routine for neat, bubble-free results
If you want the lettering to look crisp (not rippled), slow and steady wins. Plan your landing spot, then apply in controlled sections.
If you’ll be using cleaning sprays nearby, good airflow helps keep odors down. The EPA’s basics on ventilation are a helpful refresher: EPA: Indoor air quality and ventilation. For general best practices on clean removal with adhesive products, we also like: 3M Command tips.
Styling ideas that keep the look modern (not cluttered)
Removal and refresh: updating the wall without stress
In-stock picks from our store
- Creative English Slogan Kitchen Wall Sticker – Modern Home Décor
- The Ultimate Employee Motivation Checklist (Printable PDF Download)
- Understanding Attachment Theory for Parents (Digital Download)
FAQ
Will it stick to a textured wall?
Smooth surfaces work best. Light texture may hold if you press carefully across raised areas, but heavy texture reduces contact and can lead to lifting. If you’re unsure, test a small corner in a discreet spot first.
How do you apply a wall sticker without bubbles?
Clean and fully dry the surface, use painter’s tape for quick guides, then apply from one edge in small sections. Smooth as you go with a card wrapped in a soft cloth, pressing firmly and evenly. Let it sit for several hours before wiping around it.
Can it be removed without damaging paint?
Removal is easiest on fully cured paint. Peel slowly at a low angle, and use gentle heat if the adhesive feels stubborn. Freshly painted walls are more vulnerable, so take extra care and don’t rush.










Leave a comment