-
Shop
- Advanced Technologies
- Beauty
- Best-Sellers
- Car Accessories
- Dating & Social Skills
- Digital Resources
- AI & Technology
- AI Skills
- Car Buying & Ownership
- Cozy Feast Collection
- Electronics & Technology
- Emotional Intelligence
- Financial Education
- Hobbies
- Home Styling & Organization
- Kitchen & Recipes
- Mindfulness
- Mindset
- Online Business
- Parenting & Child Development
- Pet Lifestyle & Wellness
- Positive Thinking
- Productivity
- Self Confidence
- Sleep Improvement
- Smart Life with AI
- Stress Management & Relaxation
- Travel Planning
- Yoga & Fitness
- Yoga & Mind-Body Practices
- Education & Learning
- Family & Parenting
- Fashion
- Fashion Accessories
- Furniture
- Gadgets
- Health & Beauty
- Health & Wellness
- Home & Garden
- Home Supplies
- Kids & Babies
- Kitchen
- Kitchen Best-Sellers
- Lighting
- Patio, Lawn & Garden
- Personal Growth
- Personal Style & Fashion
- Pet Care
- Pet Supplies
- Pets
- Sport & Outdoors
- Super Deals
- TikTok Growth & Monetization Mastery
- Travel
- Wealth
- Wealth Building
- Budgeting & Saving
- Cryptocurrency Investing
- Debt Management
- Entrepreneurship & Business Growth
- Family Finance & Budgeting
- Financial Independence
- Financial Mindset & Psychology
- Financial Planning
- Frugal Living & Expense Hacks
- Goal Setting
- High-Income Skills
- Investing Basics
- Leadership
- Motivation
- Networking & Mentorship
- Passive Income Strategies
- Real Estate Investing
- Side Hustles
- Stock Market Investing
- Wellness
- Popular
- Best deals
Clear Kitchen Counters That Stay Clutter-Free
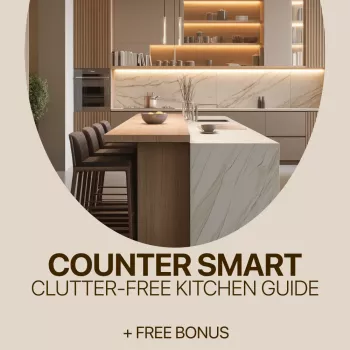
Clear, Calm Kitchen Counters Start with the Right Goal
Clear counters make everyday cooking faster, cleaning easier, and the kitchen feel more restful. The goal isn’t an empty kitchen—it’s a counter setup that supports how meals are actually made, with only the right items out, stored in the right zones, and maintained with small habits that prevent clutter from returning. When counters are crowded, prep space shrinks, crumbs and grease collect around objects, and “quick wipe-downs” turn into a bigger project.
A smarter approach is to decide what truly deserves a spot on the counter, give everything else a simple home, and keep the system going with tiny resets that fit real life.
What Counts as Counter Clutter (and Why It Keeps Coming Back)
Clutter isn’t just “too much stuff”—it’s anything on the counter that doesn’t earn its space through frequent use or a clear purpose. A few intentional items can look tidy and work well; a pile of “sort later” items makes the whole kitchen feel busier than it is.
- Most counter piles form because items have no assigned home (mail, vitamins, kid gear, small appliances, reusable bottles).
- “Temporary” drops become permanent when the counter is the easiest landing zone.
- A clutter-free counter still allows for a few intentional daily-use items placed with spacing and boundaries.
Set the Rules: What Stays Out vs. What Gets Put Away
Instead of debating every object every day, set simple rules once. Start by choosing a maximum number of “counter residents” per zone (prep area, coffee/tea area, sink/cleaning area). Then sort items by frequency:
- Daily or near-daily: can stay out if it supports a routine and has a contained footprint.
- Weekly: store in an easy-to-reach cabinet or drawer near where it’s used.
- Rarely used: move up high, to a pantry shelf, or to another storage area entirely.
Protect the main prep surface: it should be the largest clear span possible, even in a small kitchen. Finally, use containment for the few items that do stay out—one tray or bin per cluster—to reduce visual noise and make cleaning faster.
Quick decisions for common counter items
| Item | Best home | Why |
|---|---|---|
| Knife block | Drawer organizer or slim block (if used daily) | Frees space and improves wipe-down speed |
| Paper towels | Under-sink or wall/under-cabinet holder | Keeps the prep area open |
| Coffee pods/tea bags | Single lidded container in a cabinet or on a tray | Looks tidy and limits visual noise |
| Mail and receipts | Entryway sorter or a lidded inbox | Prevents paper creep into cooking zones |
| Cooking oils | Cabinet near the stove or a small bottle on a tray | Reduces grease film and crowding |
| Fruit bowl | Keep if eaten daily; otherwise move to pantry/fridge | Avoids attracting pests and saves space |
Create Counter Zones That Match Real Life
Zones prevent “spreading,” because each area has a job. A zone can be half a counter in a small kitchen; it still works if the boundaries are clear.
- Prep zone: keep it clear except for a cutting board holder or a small utensil crock only if it’s truly used daily.
- Cooking zone: store tools near the stove inside a drawer; keep the counter free for hot dishes and staging.
- Cleaning zone: place soap and one scrub tool in a small caddy; store backups under the sink.
- Coffee/breakfast zone: group items on one tray so the rest of the counter stays open.
- Drop zone: if needed, assign a small contained spot away from the prep area—then empty it daily.
For food safety basics—especially when you’re reworking prep and cleaning habits—follow guidance from the USDA Food Safety and Inspection Service.
Declutter in 20 Minutes: A Fast Reset That Works Even on Busy Days
This reset is designed for visible progress without needing a full weekend. Set a timer and move quickly—perfection isn’t the point.
For reliable cleaning and disinfecting steps, reference the CDC guidance on cleaning and disinfecting, then tailor it to your kitchen surfaces and routines.
Organize for Maintenance: Storage Tweaks That Prevent Re-Cluttering
Keep Counters Clear: Simple Daily and Weekly Habits
A Guided Plan for Clear Counters That Stay That Way
A step-by-step approach reduces decision fatigue: decide your zones, choose what stays out, assign homes, then build a maintenance routine. If a structured walkthrough sounds helpful, Counter Smart: Your Simple Guide to a Clutter-Free Kitchen breaks the process into small, practical sessions focused specifically on counters.
If you like checklist-style momentum for routines beyond the kitchen, these digital downloads are also available: The Ultimate Employee Motivation Checklist and Understanding Attachment Theory for Parents.
FAQ
How do clear counters stay realistic in a small kitchen?
Use zones, keep the main prep surface as open as possible, and limit “counter residents” to true daily-use items. A single tray or caddy can contain essentials so they don’t spread across the whole counter.
What should always be stored off the counter?
Paperwork, spare appliances, duplicate supplies, bulk items, and most medications/vitamins are best kept off the counter to reduce mess and improve cleaning. If something must stay visible for a daily routine, contain it neatly and keep it away from the primary prep area.
How long does it take to get counters under control?
A 20-minute reset usually makes a noticeable difference right away. Plan on 1–2 hours to fully assign homes and adjust storage, then maintenance typically becomes a 2–5 minute daily habit.















Leave a comment