-
Shop
- Advanced Technologies
- Beauty
- Best-Sellers
- Car Accessories
- Dating & Social Skills
- Digital Resources
- AI & Technology
- AI Skills
- Car Buying & Ownership
- Cozy Feast Collection
- Electronics & Technology
- Emotional Intelligence
- Financial Education
- Hobbies
- Home Styling & Organization
- Kitchen & Recipes
- Mindfulness
- Mindset
- Online Business
- Parenting & Child Development
- Pet Lifestyle & Wellness
- Positive Thinking
- Productivity
- Self Confidence
- Sleep Improvement
- Smart Life with AI
- Stress Management & Relaxation
- Travel Planning
- Yoga & Fitness
- Yoga & Mind-Body Practices
- Education & Learning
- Family & Parenting
- Fashion
- Fashion Accessories
- Furniture
- Gadgets
- Health & Beauty
- Health & Wellness
- Home & Garden
- Home Supplies
- Kids & Babies
- Kitchen
- Kitchen Best-Sellers
- Lighting
- Patio, Lawn & Garden
- Personal Growth
- Personal Style & Fashion
- Pet Care
- Pet Supplies
- Pets
- Sport & Outdoors
- Super Deals
- TikTok Growth & Monetization Mastery
- Travel
- Wealth
- Wealth Building
- Budgeting & Saving
- Cryptocurrency Investing
- Debt Management
- Entrepreneurship & Business Growth
- Family Finance & Budgeting
- Financial Independence
- Financial Mindset & Psychology
- Financial Planning
- Frugal Living & Expense Hacks
- Goal Setting
- High-Income Skills
- Investing Basics
- Leadership
- Motivation
- Networking & Mentorship
- Passive Income Strategies
- Real Estate Investing
- Side Hustles
- Stock Market Investing
- Wellness
- Popular
- Best deals
Dollhouse Making for Beginners: Build a Mini Room Step by Step
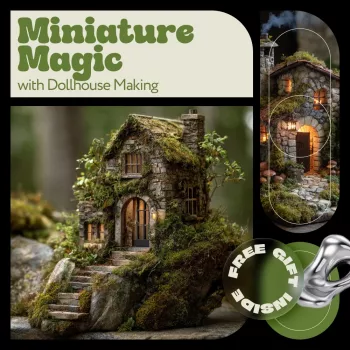
Miniature Magic with Dollhouse Making: A Step-by-Step Mini Home Guide for Beginners
Dollhouse making blends craft, design, and storytelling—one tiny room at a time. The best part is how approachable it can be: choose a scale, build a simple room box, then add realistic finishes and miniature details that make the scene feel lived-in. Below is a beginner-friendly path to go from “blank box” to a miniature space with personality.
What Makes Dollhouse Making So Satisfying
Miniatures reward small efforts. A single evening can produce a painted wall, a plank floor, or a tiny stack of books—progress you can actually see.
- A hands-on creative hobby that fits into short sessions: one wall, one chair, one accessory at a time
- Easy to personalize: modern, vintage, fantasy, cozy cottage, or seasonal rooms
- Builds practical skills—measuring, cutting, painting, layout planning, and texture work
- Great for upcycling: packaging, fabric scraps, balsa, coffee stirrers, and thrifted findings can become realistic mini materials
For a little inspiration and context on how dollhouses evolved from status symbols to beloved hobbies, the Smithsonian’s overview is a fun read: The Surprising History of Dollhouses.
Pick a Scale and Plan Your First Mini Room
Scale is the “language” your mini world speaks. Staying consistent is what makes a room feel believable at a glance.
- Common scales: 1:12 (classic), 1:24 (smaller), 1:48 (micro); choose one and stay consistent for realism
- Start with a single room box to practice walls, floor, and lighting without committing to a full house build
- Make a quick mood board: colors, materials, and a short list of must-have pieces (bed or sofa, table, lamp, wall art)
- Use simple reference measurements (door height, countertop height, chair seat height) and convert them to your chosen scale
- Sketch a top-down layout before building to avoid cramped furniture and awkward door swings
Quick scale conversions (real life to miniature)
| Real measurement | 1:12 scale | 1:24 scale | 1:48 scale |
|---|---|---|---|
| 1 ft (12 in / 30.5 cm) | 1 in / 2.54 cm | 0.5 in / 1.27 cm | 0.25 in / 0.64 cm |
| 6 ft (72 in / 183 cm) | 6 in / 15.2 cm | 3 in / 7.6 cm | 1.5 in / 3.8 cm |
| 8 ft ceiling (96 in / 244 cm) | 8 in / 20.3 cm | 4 in / 10.2 cm | 2 in / 5.1 cm |
If scale math is new, a quick primer on ratio can make conversions feel less mysterious: Britannica — Scale (ratio).
Beginner-Friendly Tools and Materials (What Matters Most)
You don’t need a workshop. A small set of reliable basics prevents frustration and helps everything look cleaner.
- Cutting: craft knife with fresh blades, metal ruler, cutting mat; small scissors for fabric and paper
- Assembly: tacky glue or PVA for porous materials; tweezers and clips for holding tiny parts while drying
- Finishes: acrylic paint, fine-grit sandpaper, small brushes, sponge for subtle texture
- Building basics: foam board, chipboard, basswood/balsa strips, cardstock, coffee stirrers for planks
- Mini realism boosters: matte varnish, chalk pastels for dust/wear, thin wire for handles and hooks
Because many miniature tasks involve blades, adhesives, and small parts, it’s worth skimming the CPSC Art and Craft Safety Guide and setting up a simple “safe zone” for cutting and drying.
Build the Mini Room: A Simple Step-by-Step Workflow
Think of the process like a real renovation: structure first, then surfaces, then furniture and styling.
- Step 1 — Base and walls: cut foam board/chipboard cleanly; dry-fit before gluing for square corners
- Step 2 — Floors: install plank or tile layers first; add a baseboard strip to hide edges
- Step 3 — Walls and trim: wallpaper, paint, or textured plaster effect; add window/door frames after wall finish
- Step 4 — Ceiling and lighting plan: decide early if you want LED strips, a ceiling light, or a table lamp with hidden wiring
- Step 5 — Furnish in layers: big pieces first (bed/sofa), then mid-size (tables), then small decor (books, plants, textiles)
- Step 6 — Final realism pass: tiny imperfections—subtle scuffs, folded fabrics, slightly varied wood tones—make scenes believable
Creative Dollhouse Making Ideas for Immediate Wins
- No-sew textiles: use fabric glue for rugs, curtains, pillows, and bedding; add trim for clean edges
- Book pages and artwork: print miniature covers or art; mount to thin cardstock and frame with craft sticks
- Kitchen miniatures: beads for jars, polymer clay for food, wire for utensil racks
- Plants and greenery: floral wire stems, paper leaves, foam flocking; vary leaf sizes for depth
- Storage baskets and boxes: weave thin paper strips or use folded cardstock templates for crisp corners
- Seasonal swaps: create small interchangeable sets (holiday throw, wreath, tiny gifts) to refresh the scene quickly
Common Beginner Mistakes (and Easy Fixes)
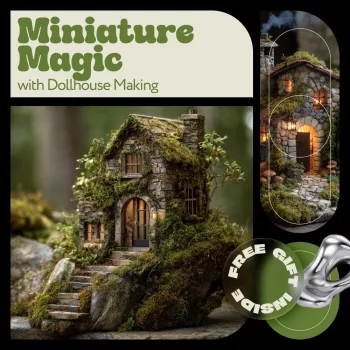
A Handy Guide to Follow Along: Miniature Magic with Dollhouse Making (Ebook)
FAQ
What scale is best for a first dollhouse project?
1:12 scale is often the easiest starting point because pieces are comfortable to handle and widely available. If you’re tight on space, 1:24 works well—just choose one scale and stick with it for a cohesive look.
What are the easiest materials to start with at home?
Foam board, cardstock, coffee stirrers or basswood, acrylic paint, tacky glue, and small fabric scraps are beginner staples. Use sharp tools carefully and cut on a proper mat to keep edges clean and hands safe.
How can mini furniture and decor look more realistic?
Use mostly matte finishes, keep scale consistent, and add layers like rugs, trim, and wall art at different heights. Small “functional” touches—handles, cords, stacked books, and subtle wear—make mini scenes feel real.














Leave a comment